How to add a colored lip in Bambu Studio
When I printed my first Gridfinity box, I wanted to add a thin colored lip as an accent to match the baseplate. At first, I tried to find a model that already included the lip, but I couldn’t find one that fit my needs. So, I decided to figure out how to do it myself in Bambu Studio. It’s actually pretty straightforward!
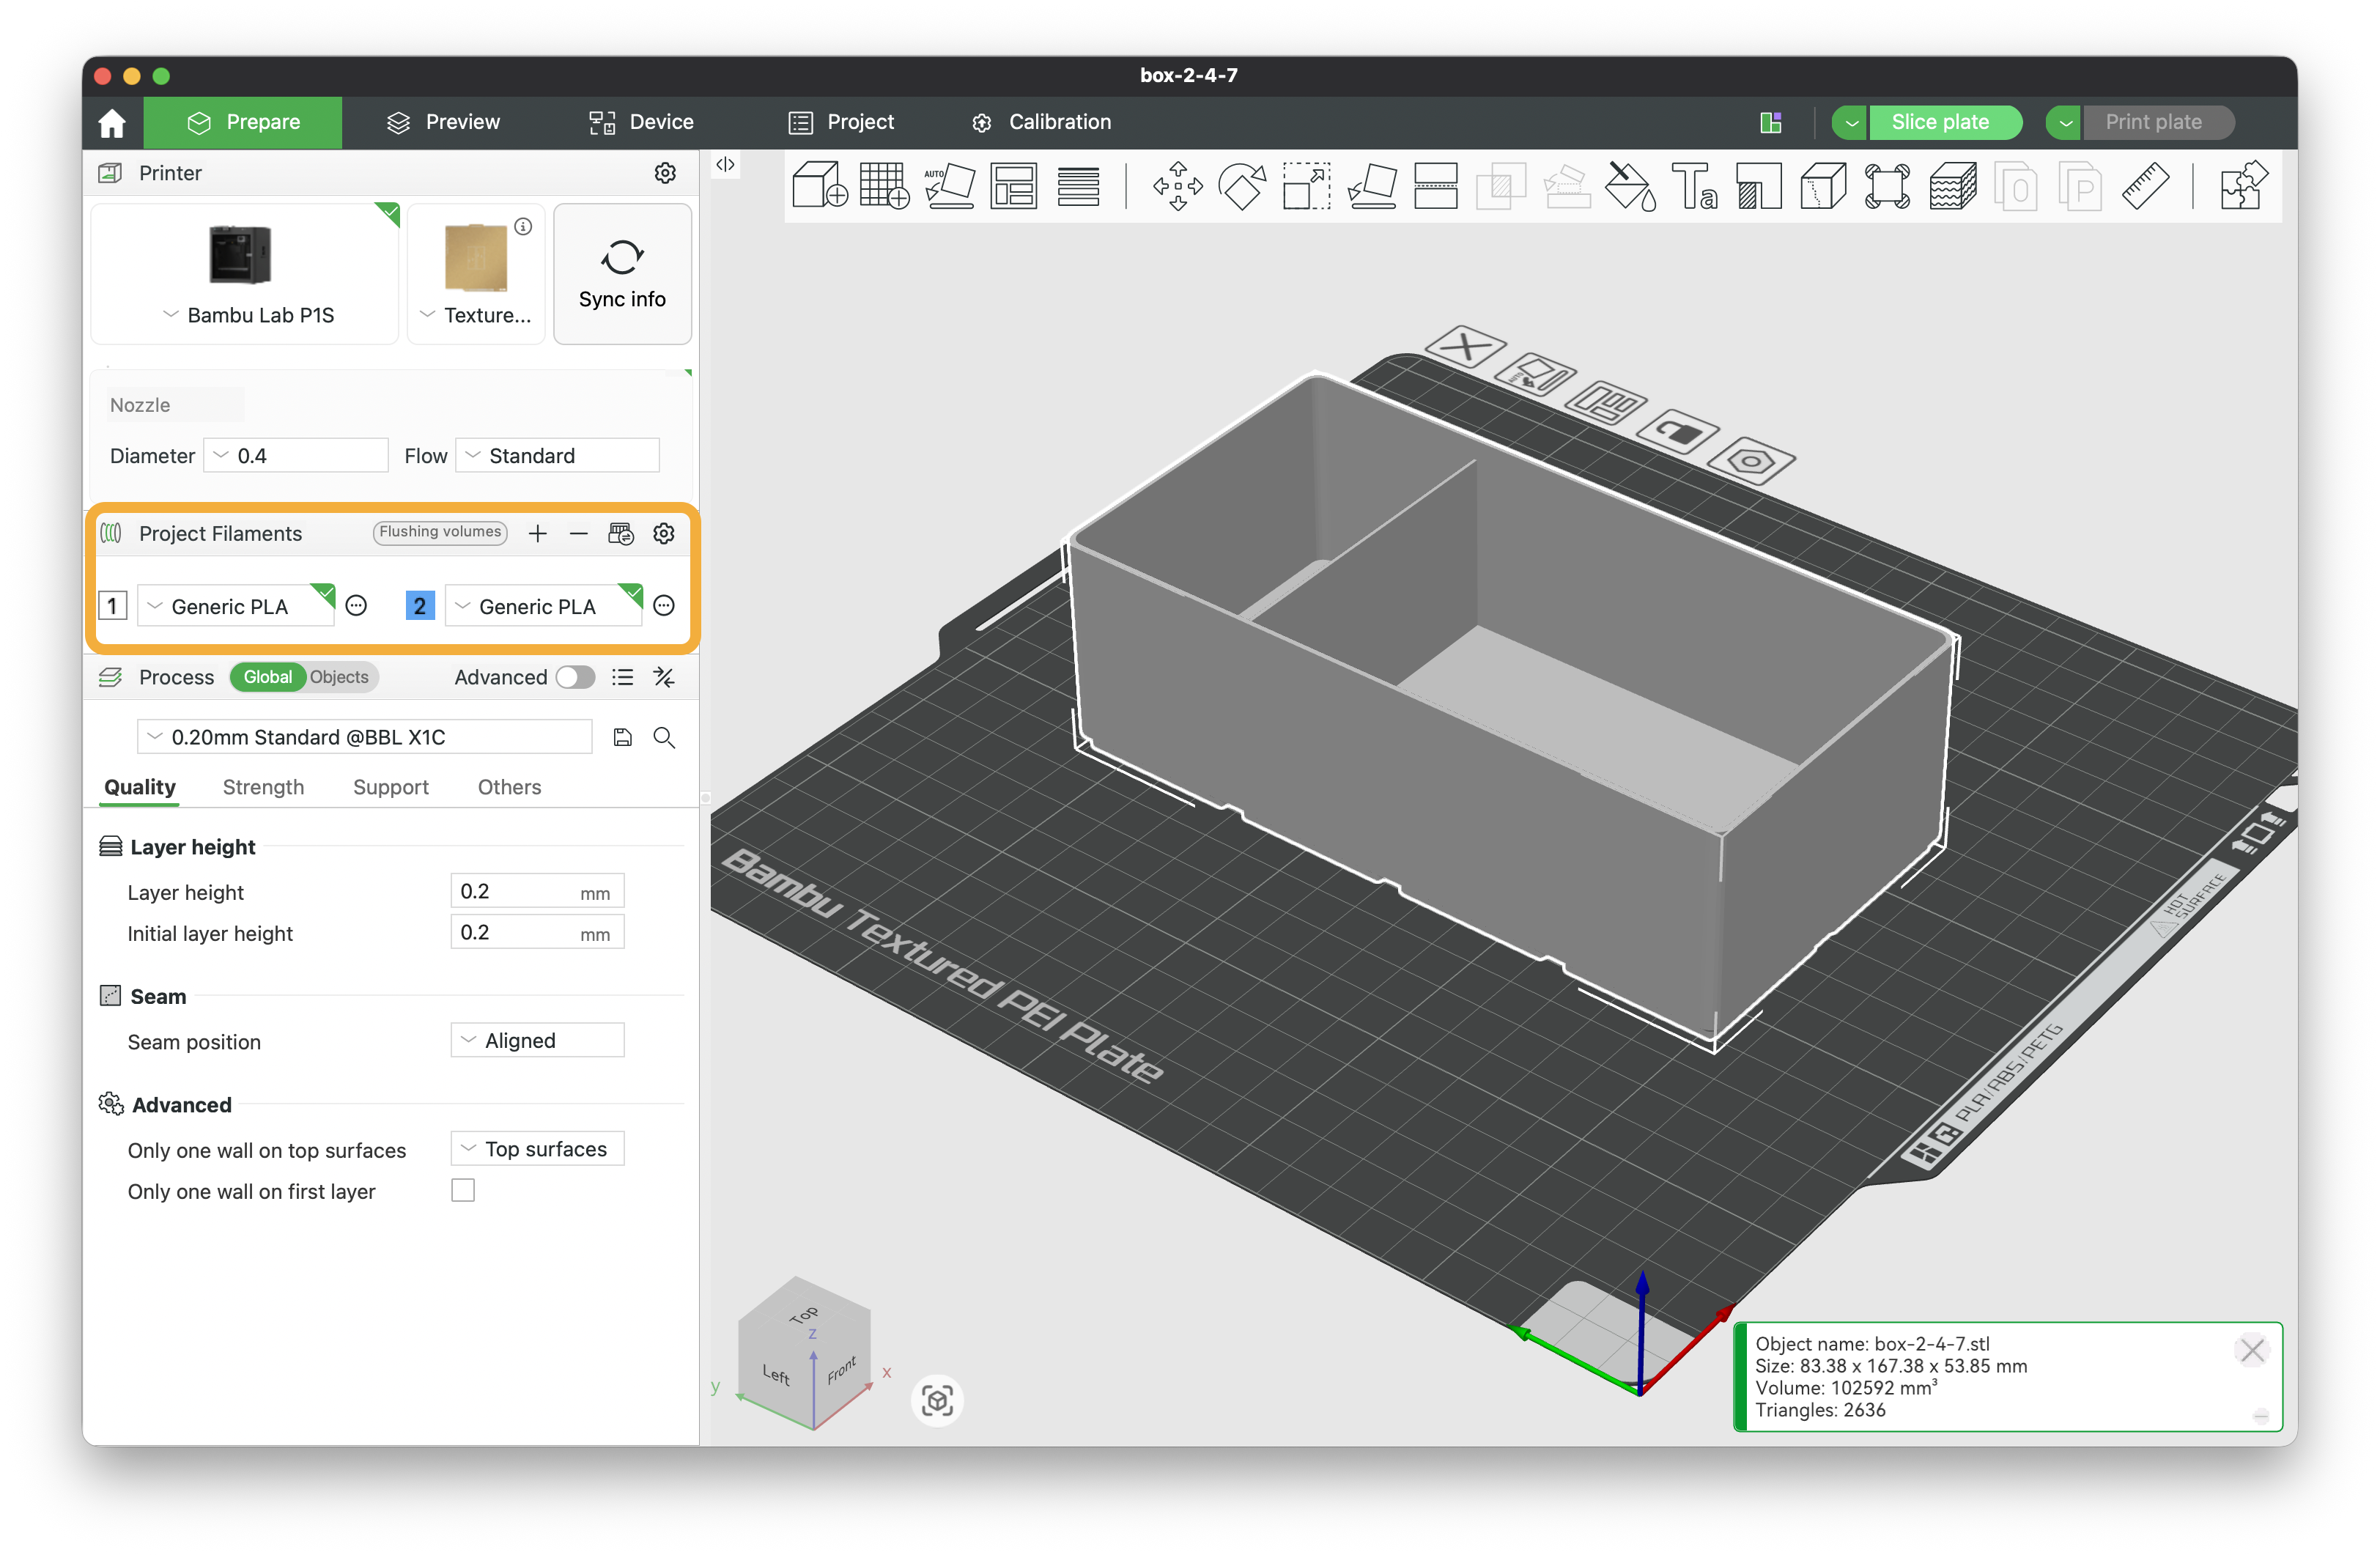
- Open or import your model in Bambu Studio.
- Make sure your project has more than one filament loaded (for example, white and blue). You can add a new filament by clicking the
+(Add one filament) icon in theProject Filamentssidebar on the left. This step is important, otherwise, you won’t be able to assign different filaments to different parts of the model.
- Click
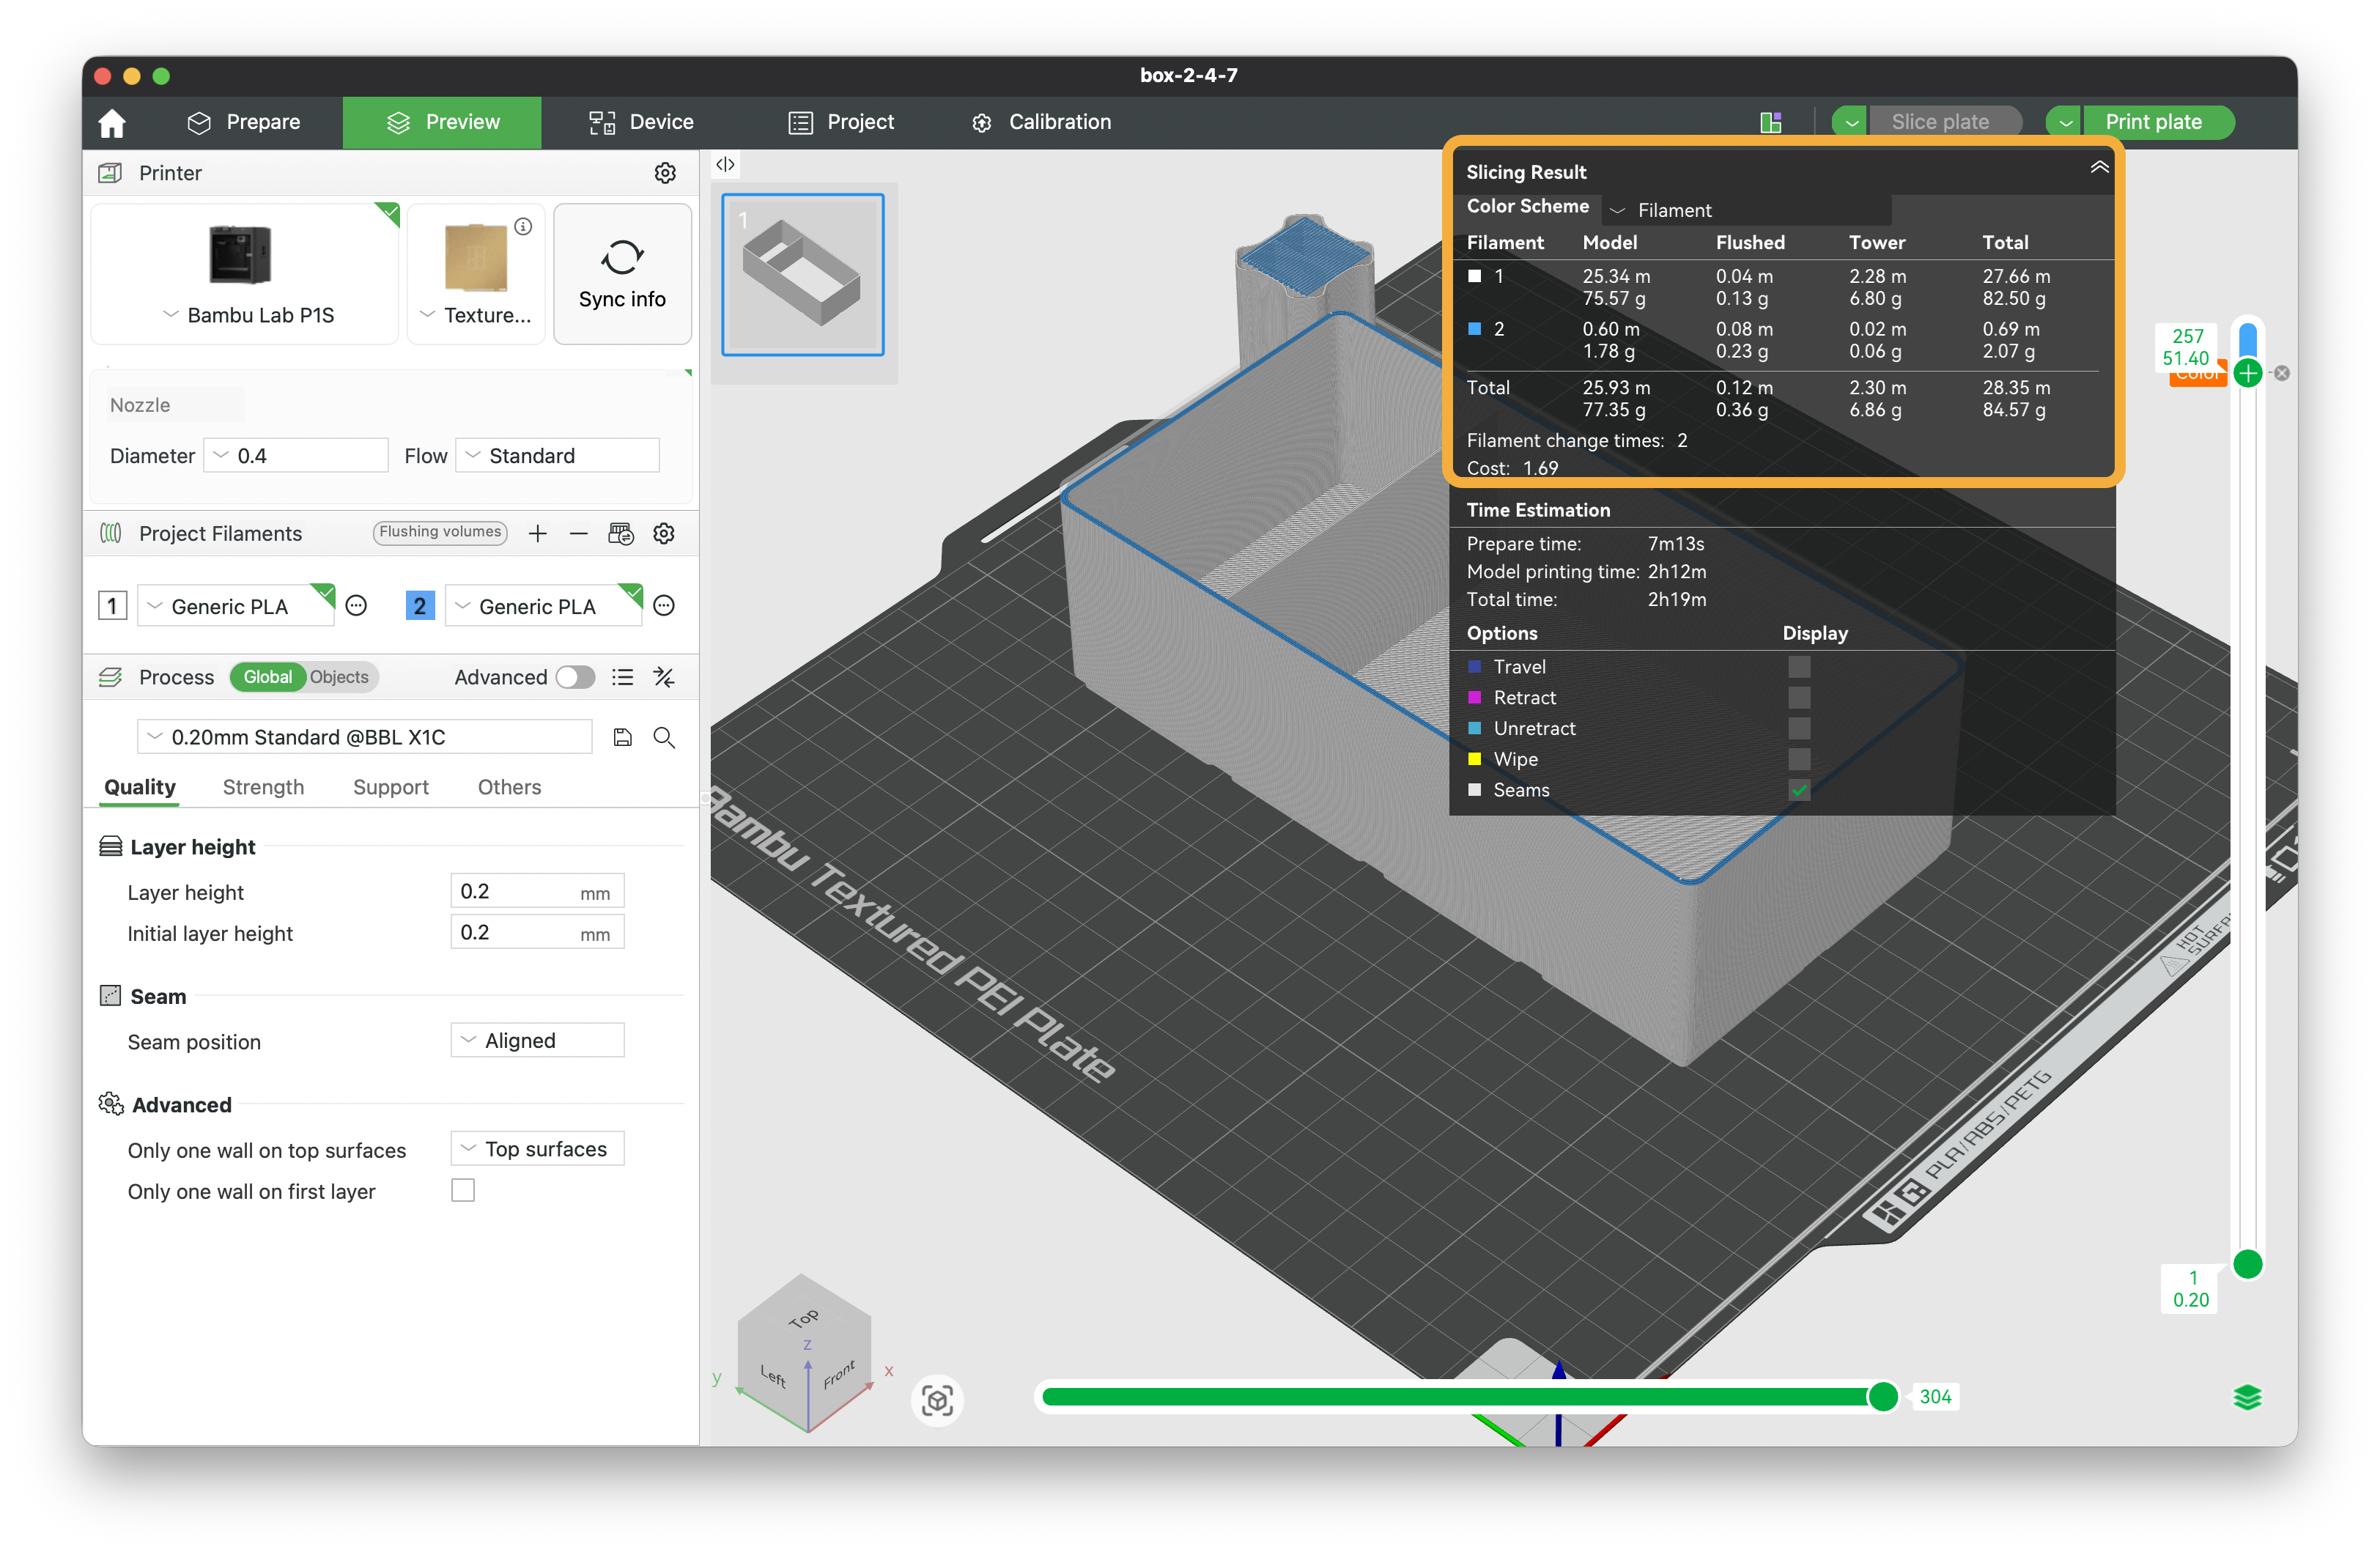
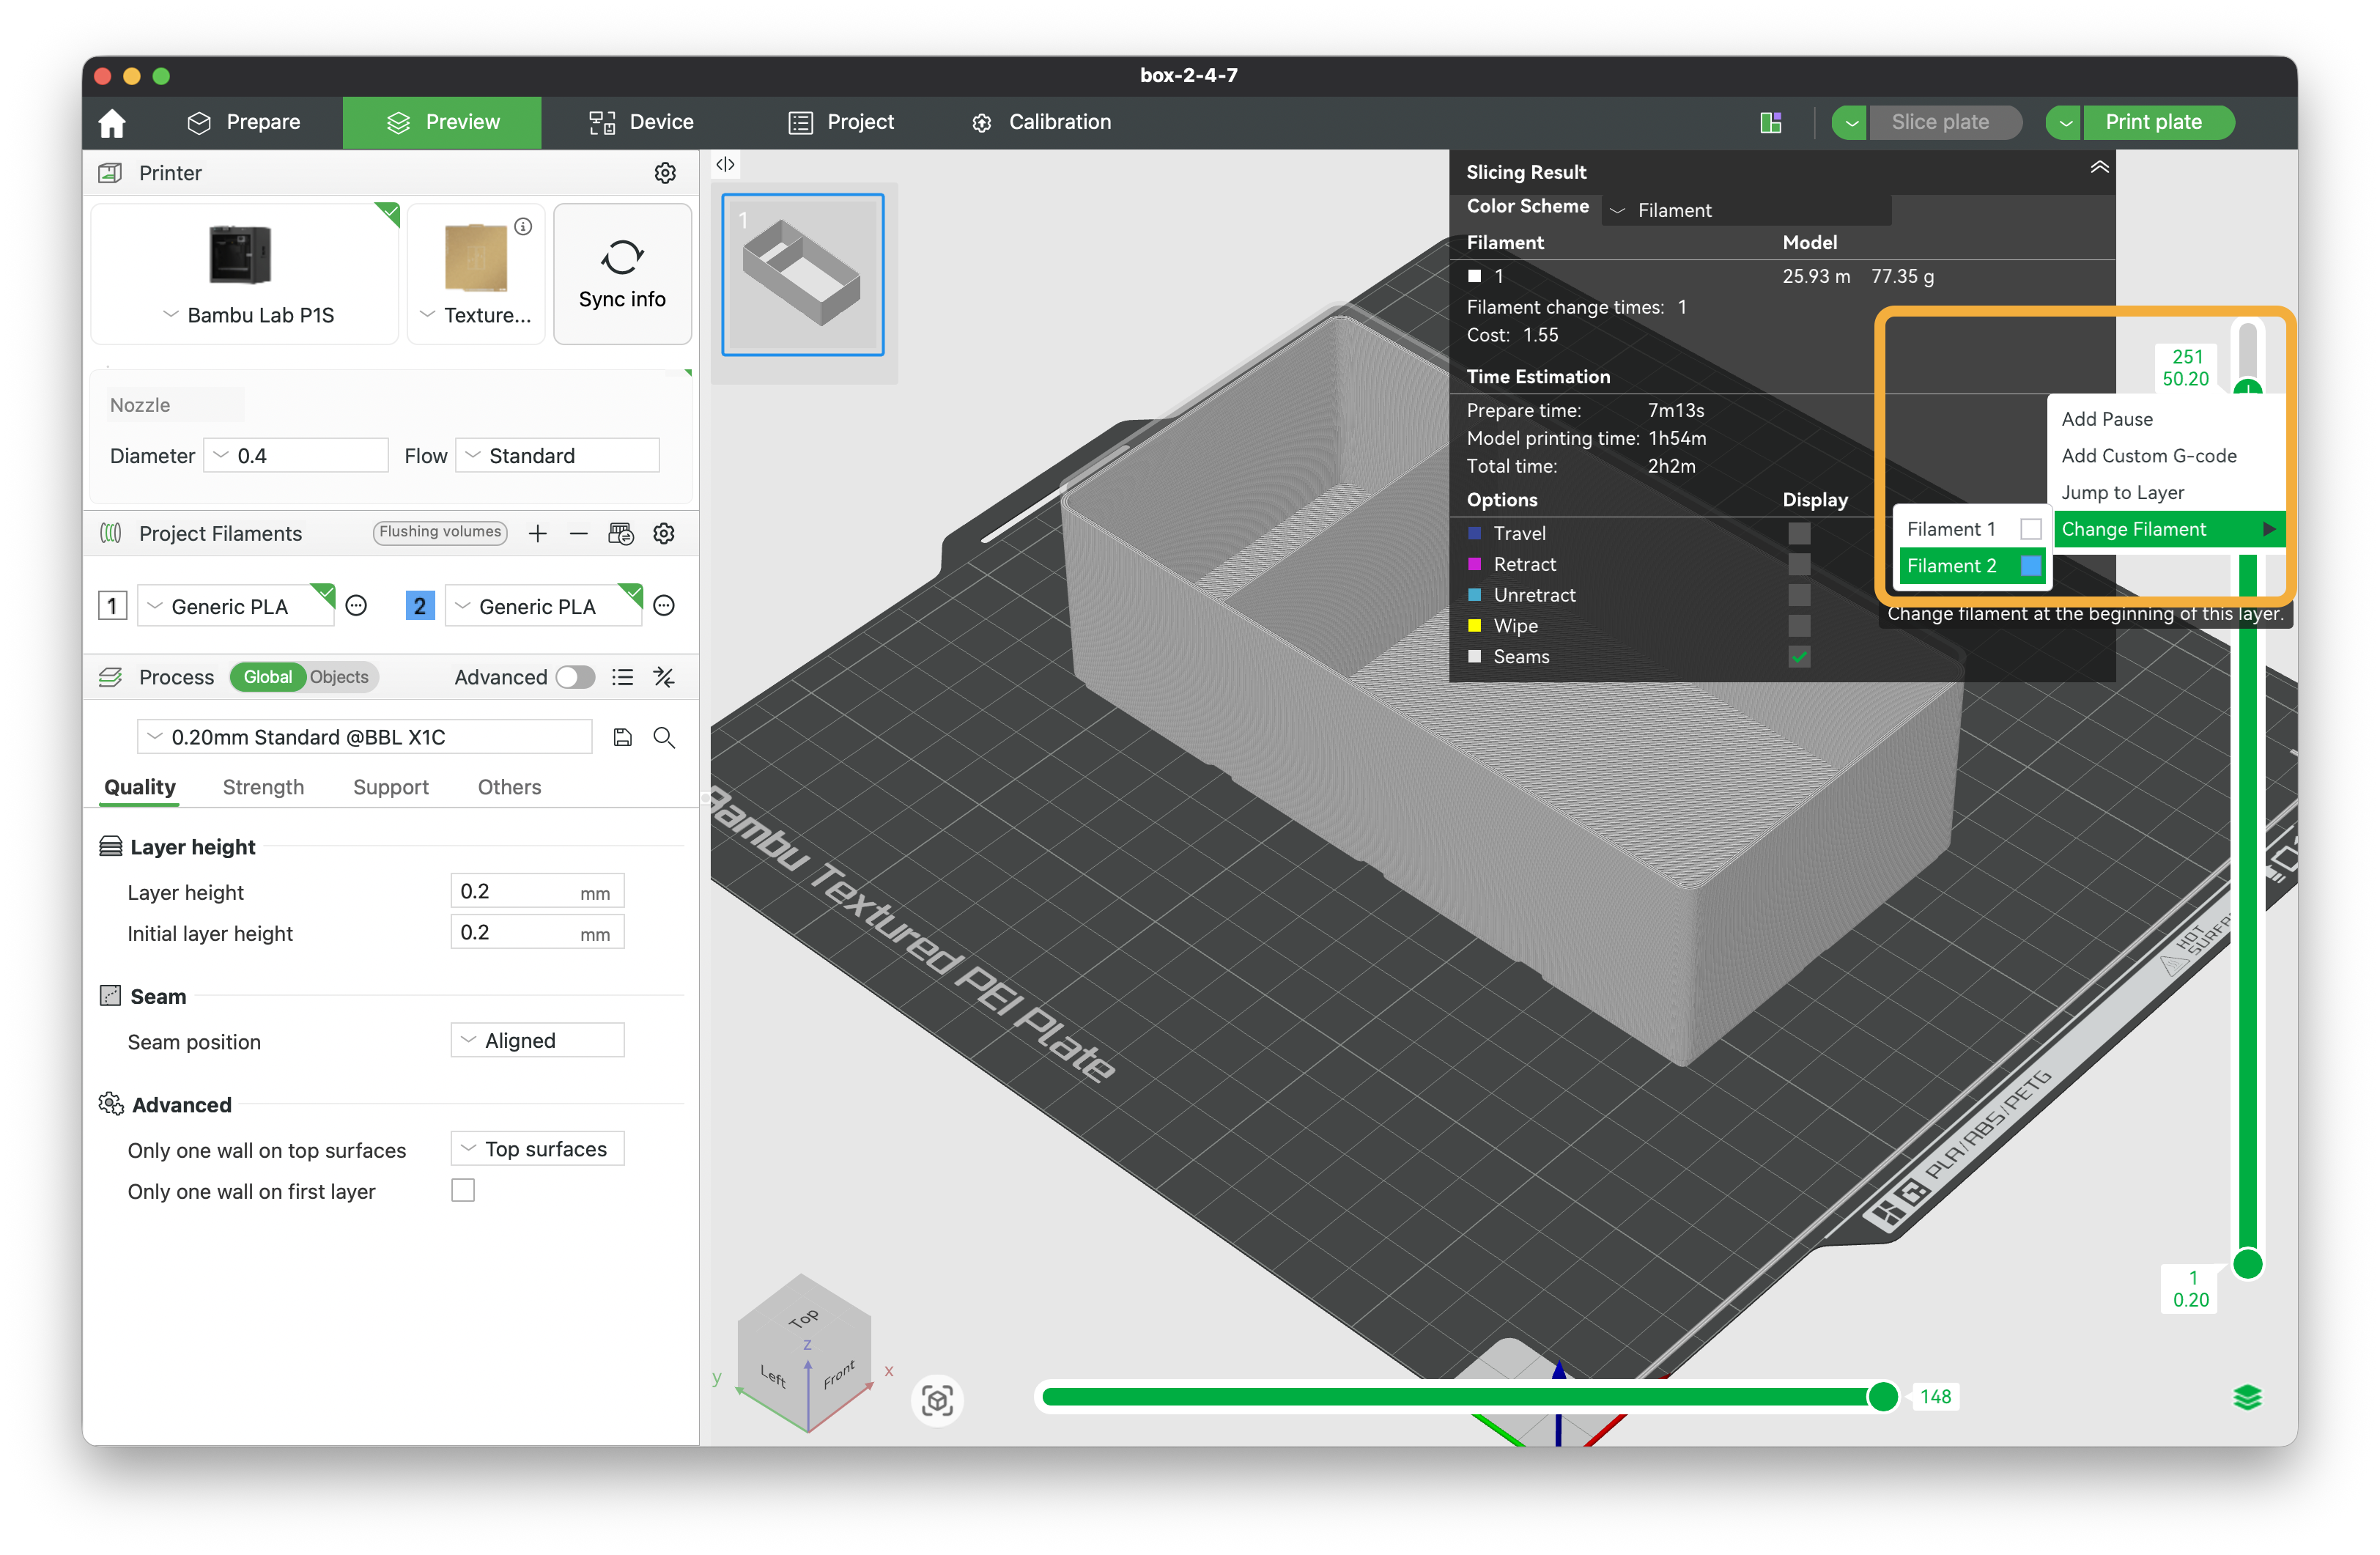
Previewin the top menu, thenSlice plateto generate the sliced model. - On the right side, you’ll see a bar with a
+icon that you can drag up and down to select different layers of the model. Move it to the height where you want the colored lip to start. - Right-click the
+icon, selectChange Filament, and choose the filament you want to use for the lip (blue, in this example).
- Click
Slice plateagain to update the sliced model with the new filament assignment. - You should now see the lip in the new color in the preview!
- Check the
Slicing Resultsection to make sure both filaments are listed and the number of filament changes looks correct.